"Help, please. I need to recover photos off android. The mistake was done and I cannot help blame myself losing my photos plus 3 videos. I used 8GB memory card in Android and recently I made a mistake by deleting my files. I cannot find them. Is there any hope of android data recovery?" --- Tomshardware
Don't worry, you still have the chance to recover your deleted files from Android, And below we'd like to introduce one of the Android data recovery programs for you. that's Tenorshare Android Data Recovery.
Tenorshare Android Data Recovery is the latest Android file recovery software program which allows you to recover deleted or lost contacts, text messages, call history, photos and videos on Android phones and tablets, such as Samsung, HTC, Motorola, LG, and etc.
Step by step to recover deleted files from Android with Tenorshare Android Data Recovery
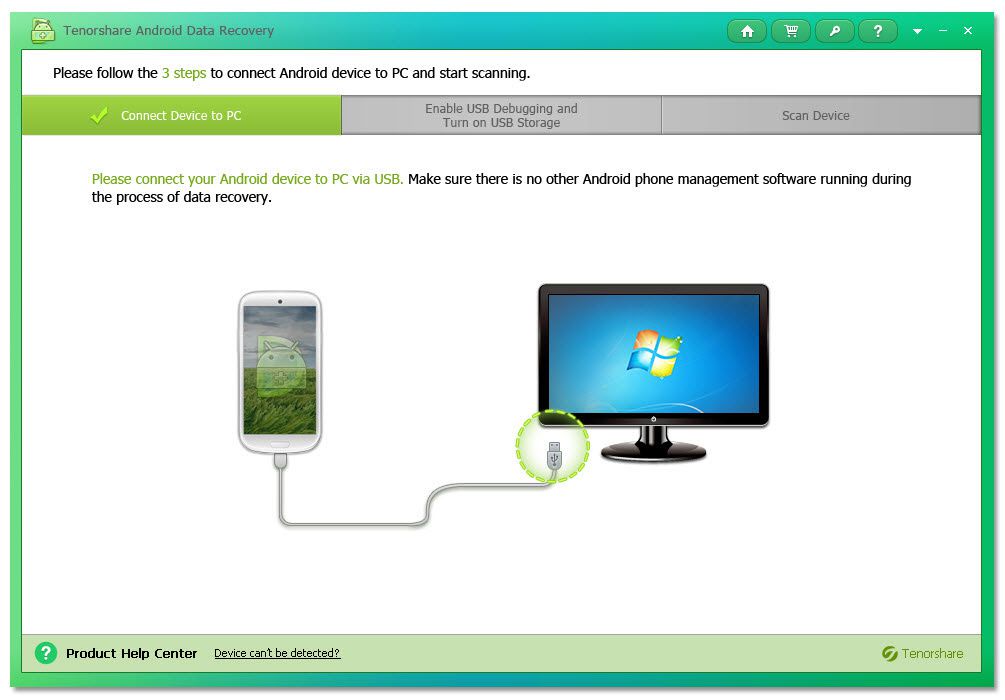
Step 1: Connect your Android device to computer
Launch Tenorshare Android Data Recovery to get the following interface. Connect your Android device via a USB cable.
If you haven’t installed USB driver for your Android device, it will launch the Hardware Update Wizard. Follow it to install Android USB driver. If this wizard doesn’t pop up, follow this article to download and install Android USB driver manually.
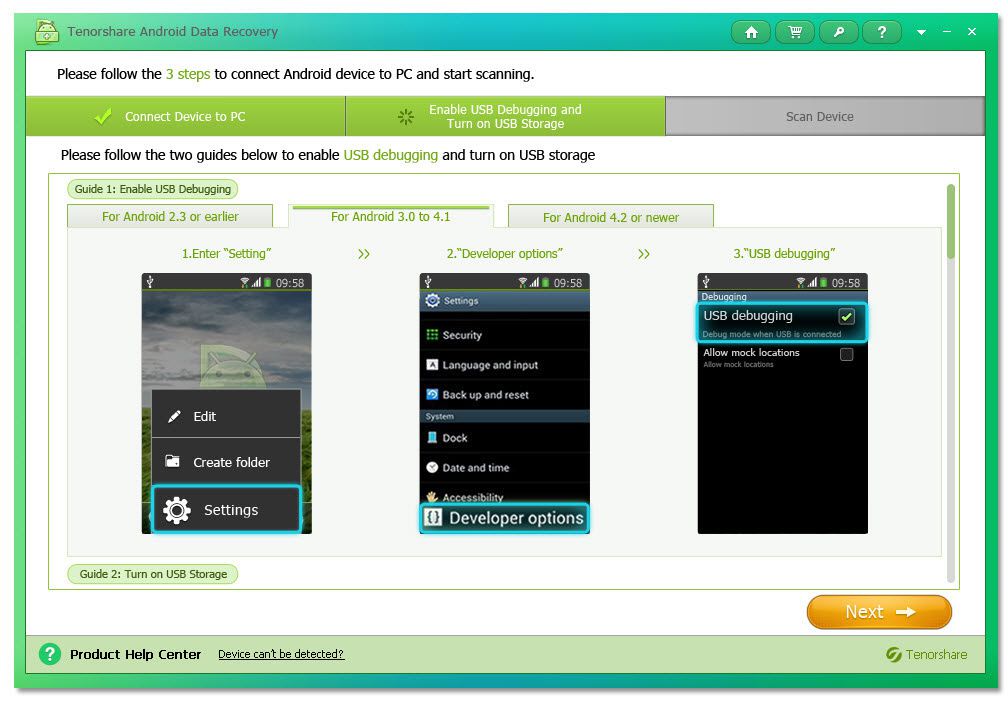
Step 2: Enable USB debugging
Follow the guide on the software screen to enable USB debugging.
- For Android 2.3 or earlier: Enter "Settings" < Click "Applications" < Click "Development" < Check "USB debugging".

For Android 3.0-4.1: Enter "Settings" < Click "Developer options" < Check "USB debugging".
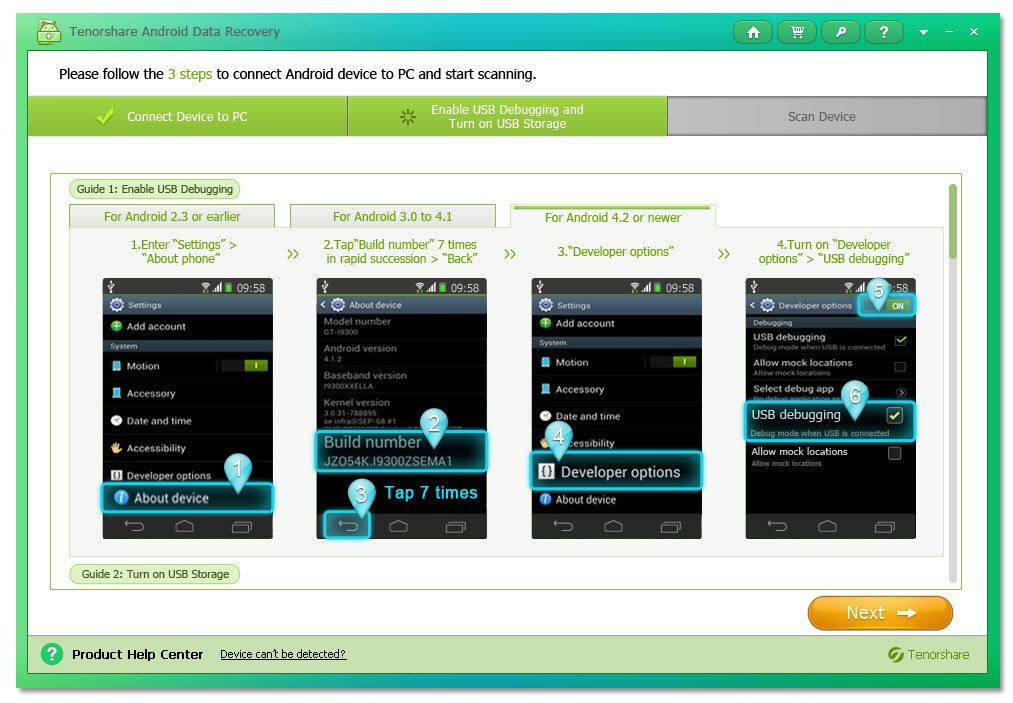
For Android 4.2 or newer: Enter "Settings" < Click "About Device" < Tap "Build number" for 7 times until getting a note "You are under developer mode" < Go back to "Settings" < Click "Developer options" < Check "USB debugging".
Step 3: Turn on USB storage
- For Android 2.3 or earlier: Pull down Notifications -> Select "USB connected" -> Tap "Turn on USB storage".

For Android 4.0: Enter "Settings" -> Click "Wireless and Network" -> Click "USB utilities" –> Click "Connect Storage to PC" -> Click "Turn on USB Storage".

Step 4: Start scanning
After USB settings, click "Opened? Next…". After your device is detected, click "Allow" when an app Superuser Request pops up on your device's screen to allow the program super user authorization. Then click "Start" on the software screen.

Step 5: Preview files on Android device
It will take several seconds to scan the files. After scanning finished, you can found all the files including existing and lost ones are listed by category. You are allowed to preview them to check if they are your need before data recovery.
Tips: Under each category, the lost files are shown in red, which makes you find the lost files more easily. What's more, you can filter lost files by ticking "Only display the deleted items".
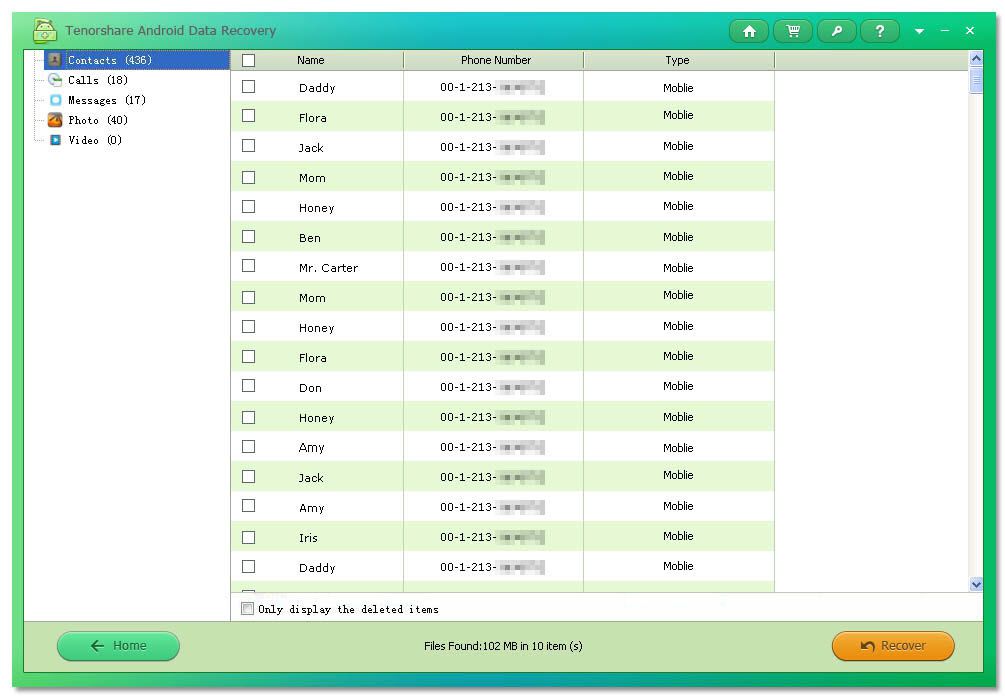
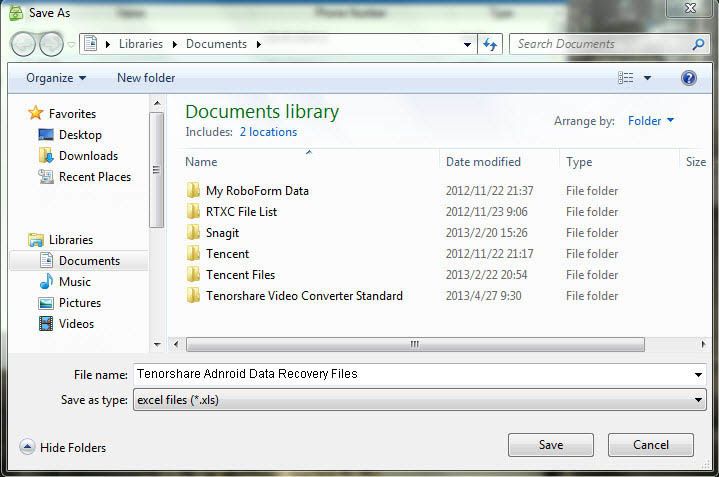
Step 6: Recover and save the files
Tick the files you need to recover. Click "Recover" to recover and save the lost files on your PC. For photos and videos, they are saved in their original formats; For contacts, text messages and call history, they are saved in .txt, .xml, .xls.